How do I add an Auto Responder?
Step 1
An Auto Responder is set up generally for if you are away from the office for an extended amount of time, for example a two week vacation.
Log into your websites cPanel.
In this example we will be using www.ffsupport.co.nz/cpanel.
If a warning screen displays, please click on Proceed Anyway.
Do not fear, W3 Design is not harming your computer. This is a general safety precaution from the Internet and cPanel service provider.
Once you are at the log in screen, enter in your cPanel username and password.
THESE ARE DIFFERENT TO THE EDIT DETAILS.
Click on Log in.Step 2
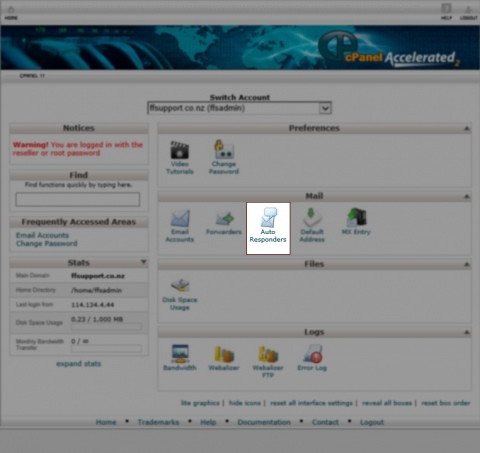
Please click on Auto Responders.
Step 3
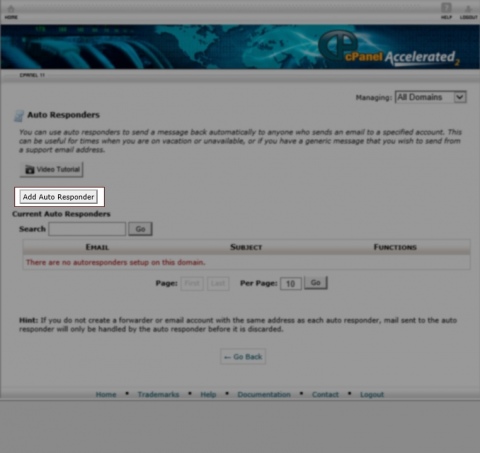
You will see a page that will show you all of the Auto Responders that have been set up (If there are any).
Please click on Add Auto Responder.
Step 4
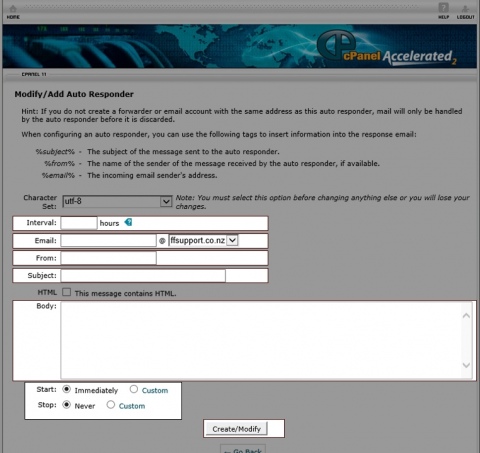
The page that will display next is the page that will do all of the magic.
The highlighted fields are the fields that you want to change and the content is what you should put in.
Please follow the picture in this example.
Email : Please put in your name of the email address.
From : Please put %from% in this field.
Subject : Please put %subject% in this field. This will reply to the person who emailed you with their subject.
Body : This is what you want your Auto Response-email to say.
Start : You can choose for the responder to start Immediately or at a date of your choice by selecting Custom. Custom will bring up a calendar which will ask you to select a date for it to start functioning, IE: When you leave the workplace.
Stop : You can choose for the responder to Never stop or at a date of your choice by selecting Custom. Custom will bring up a calendar which will ask you to select a date for it to stop functioning, IE: When you return to the workplace.
Click on Create/Modify Once finished.
Back...


